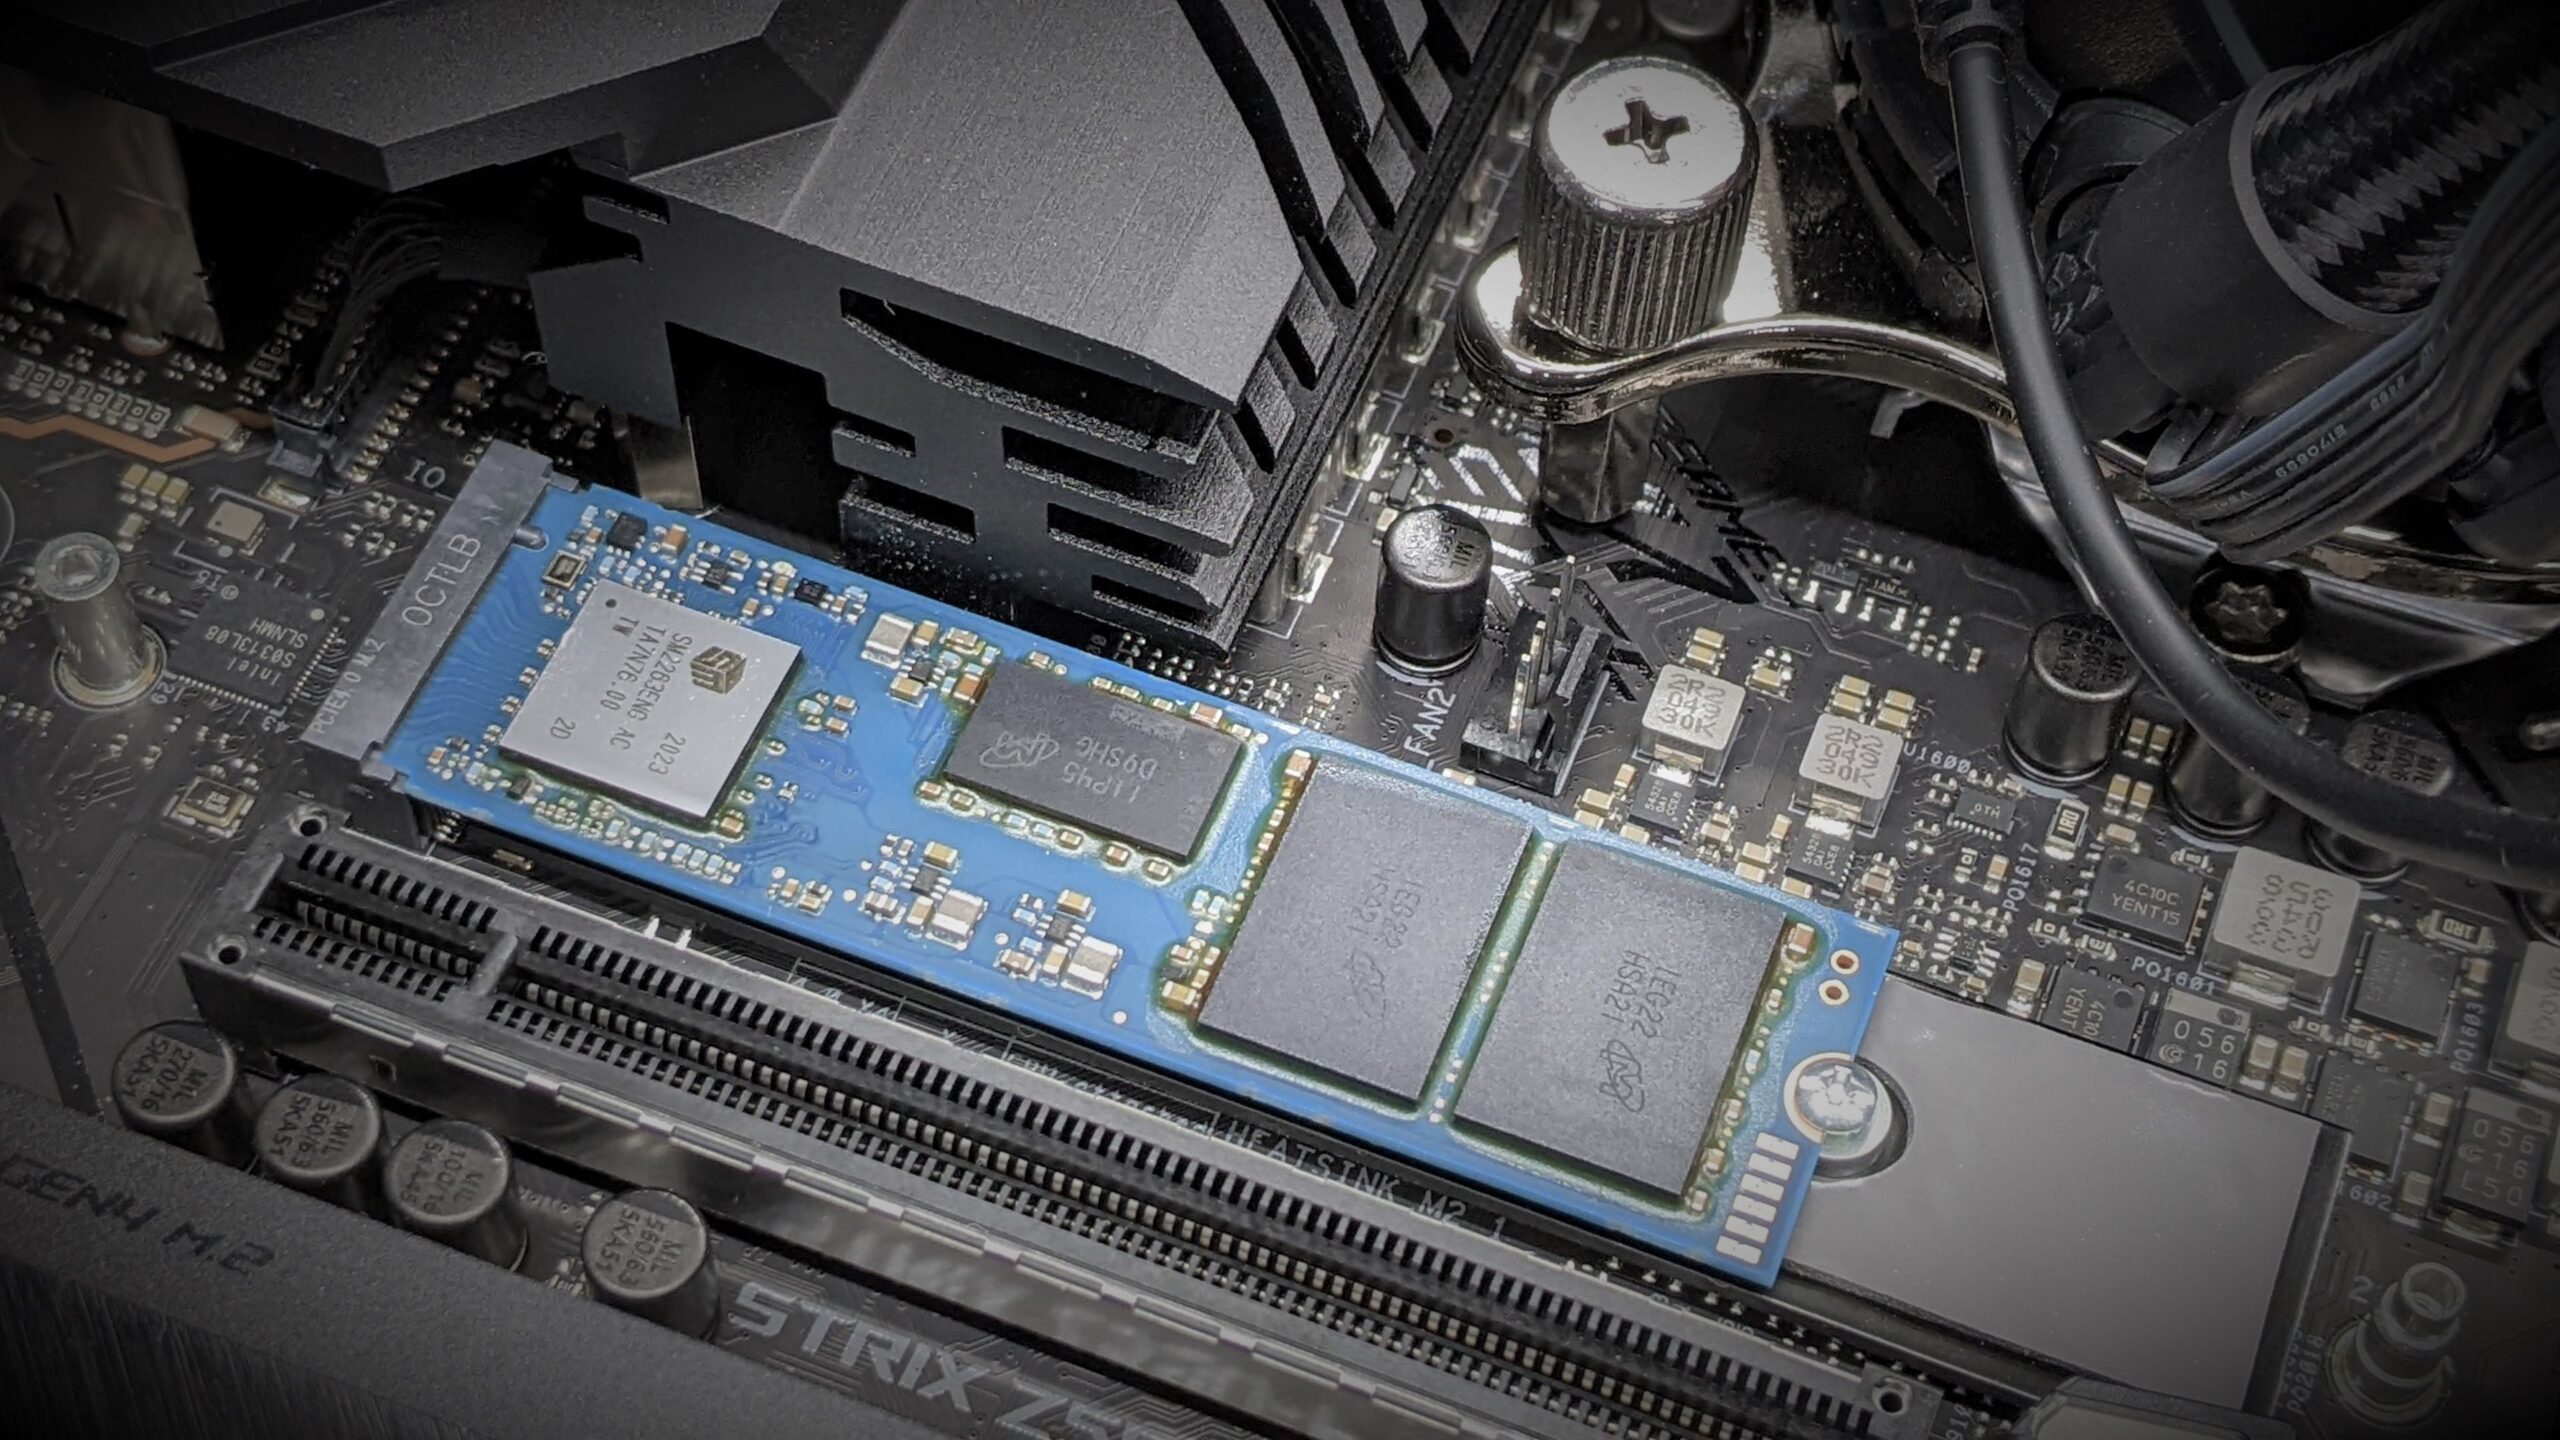
Products mentioned in this article
- NVMe SSD SN8E Series
Introduction
NVIDIA offers a lineup of developer kits for their embedded AI computing platform, the Jetson series, which allows for the installation of M.2 SSDs.
In the realm of AI computing, particularly at the edge where devices employing the Jetson series are utilized, the need for larger capacity and higher-performing storage is on the rise. NVMe SSDs are expected to meet these demands.
Therefore, in this instance, we installed our H-Series NVMe SSD on the Jetson AGX Xavier developer kit, capable of accommodating NVMe SSDs. We conducted two verifications: (1) Using the H-Series NVMe SSD as the system drive, we installed the JetPack software kit for Jetson, and (2) We confirmed the seamless execution of object recognition using JetPack bundled software on videos stored within the H-Series NVMe SSD.
Please note that the experimental results documented in this article are based on our test environment and do not guarantee the same results in every setting. Please exercise caution.
Summary
- Confirmed the operation by installing our H-Series M.2 NVMe SSD on the Jetson AGX Xavier developer kit
- Believed the performance and capacity of the NVMe SSD are suitable for edge AI computing
Precaution when installing NVMe SSDs
The Jetson AGX Xavier Developer Kit consists of two components: the “Jetson Module,” which houses the Jetson AGX Xavier, and the “Carrier Board,” featuring an M.2 slot for NVMe SSD installation, among other components.
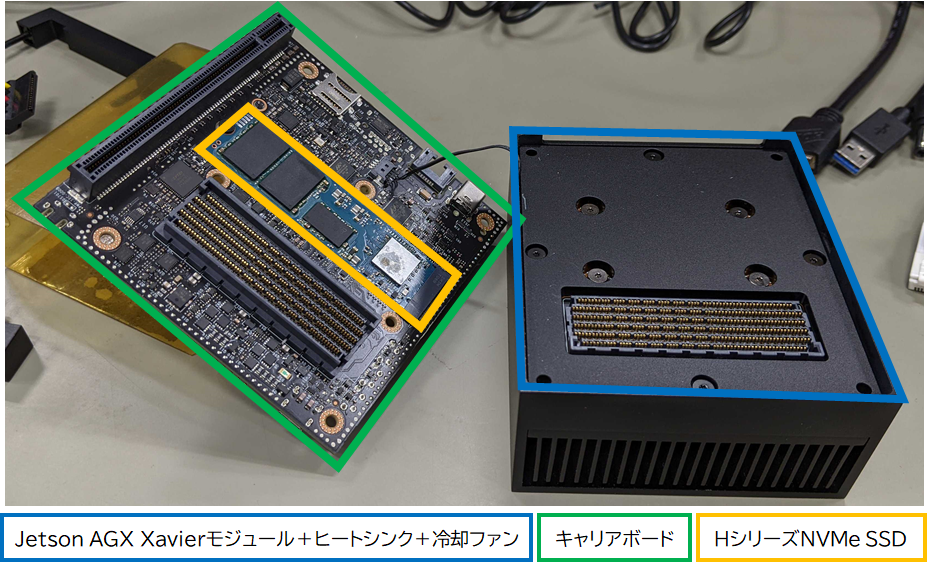
In the photo, the right side (outlined in blue) represents the Jetson Module, comprising the Jetson AGX Xavier module, a heat sink, and a cooling fan. On the left side (outlined in green) is the Carrier Board, and the M.2 SSD is located near the center of the Carrier Board (outlined in yellow). The black cable connecting the Jetson Module and the Carrier Board is likely for cooling fan control.
The Jetson Module and Carrier Board in the Jetson AGX Xavier Developer Kit are connected via high-density connectors visible in the photo. When separating them, it is important to exercise caution to avoid damaging the aforementioned black cable and connector.
In this section, we will explain three key precautions to consider when installing an M.2 NVMe SSD on this Carrier Board.
Note 1: Only single-sided M.2 SSDs can be installed
Only single-sided M.2 SSDs (size 2280) can be installed on this carrier board.
There are two types of M.2 SSDs: single-sided and double-sided. Double-sided products are thicker. Due to this added thickness, the Carrier Board of the Jetson AGX Xavier Developer Kit can only accommodate single-sided M.2 SSDs.
Our H-Series M.2 NVMe SSD, even in its maximum capacity of 1,920 GB, is a single-sided model, making it compatible with this Carrier Board. In fact, we used the 1,920 GB model for the operation verification in this case.
Note 2: No Heat Sink Attachment
Heat sinks cannot be attached to SSDs.
Some recent NVMe SSDs are sold with heat sinks pre-attached for thermal management. However, as introduced in the previous section, the M.2 slot on the Carrier Board has thickness constraints, preventing the installation of SSD-specific heat sinks.
On the other hand, the Jetson Module (highlighted in blue in the photo) features a cooling fan and a large heat sink. The component installation surface of the mounted M.2 SSD receives sufficient heat dissipation and cooling effectiveness through this cooling mechanism, rendering the attachment of a separate heat sink unnecessary.
Note 3: Avoid “Diagonal Insertion” During Installation
When installing a device into the M.2 slot, the common procedure involves first diagonally inserting the connector into the slot and then pushing the end of the device to align it with the board’s mounting screw holes.
However, in the case of this Carrier Board, there is no need to insert the device diagonally. You can install the device by keeping it parallel to the board’s surface while inserting the connector into the slot. This differs from the usual method of installing M.2 devices, so it’s essential to exercise caution, especially if you are accustomed to installing M.2 devices in the conventional way.
JetPack installation on NVMe SSD
Once you have installed the NVMe SSD, the next step is to install JetPack on the developer kit. For this verification, we chose the then-latest JetPack 5.0.1 Developer Preview (DP).
The setup of the developer kit and the installation of JetPack can be referenced from NVIDIA’s official videos and documentation.
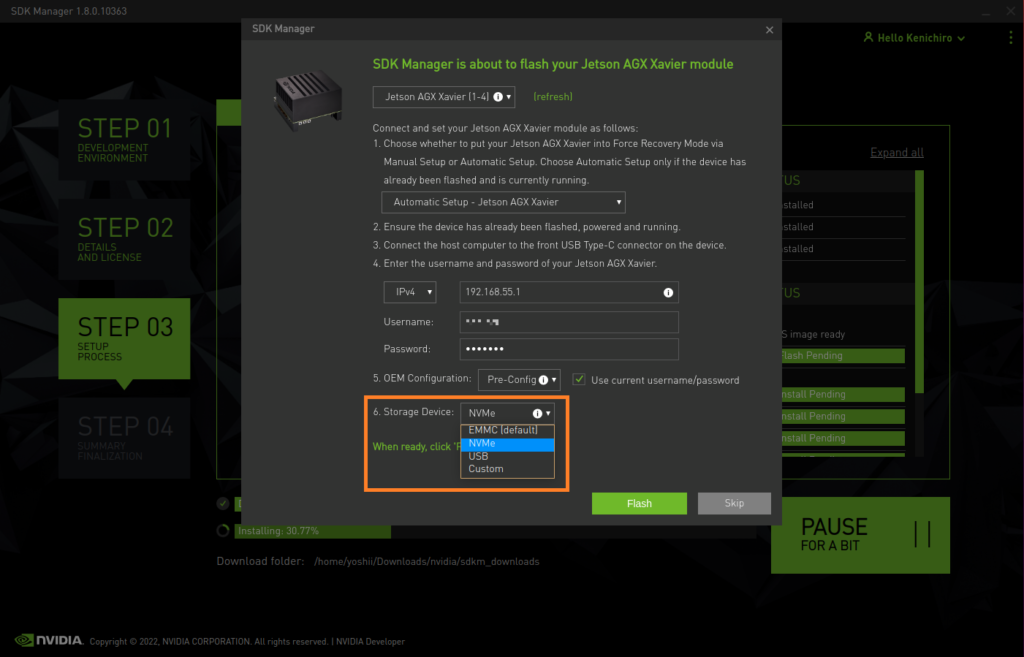
For recent Jetson developer kits, the installation of JetPack and related processes can be performed using a tool called SDK Manager. Following the instructions provided by SDK Manager will guide you through the installation process.
In the case of the Jetson AGX Xavier Developer Kit, the default installation location for JetPack is the eMMC. Therefore, you need to specify the NVMe SSD as the installation destination, as indicated in the orange-bordered area in the diagram below.
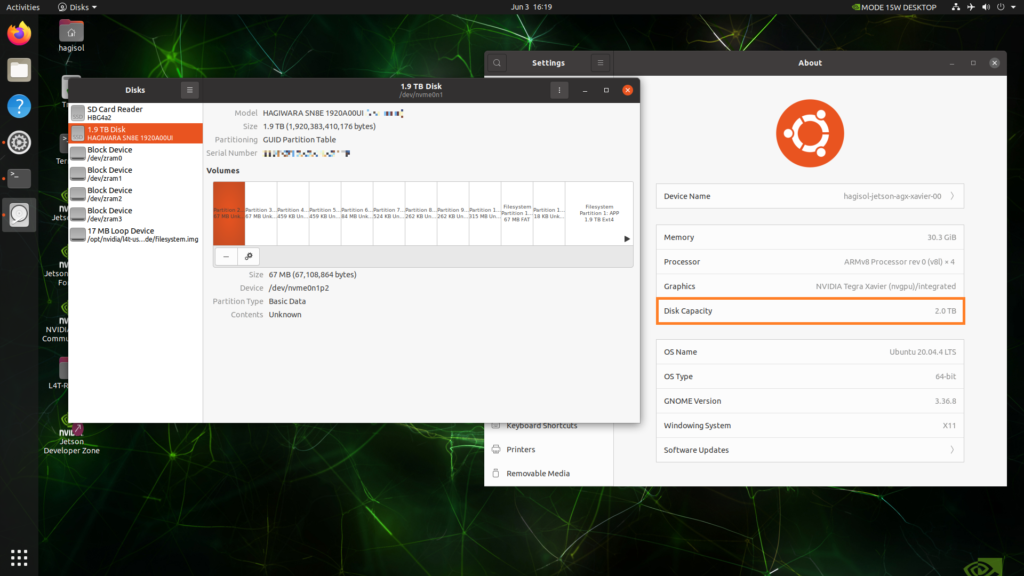
After installing JetPack, the verification results are as shown in the diagram below. The system drive capacity is displayed as 2 TB, as indicated within the orange border in the diagram.
During the standard installation of JetPack, after installing essential software like the kernel, various software packages are fetched and updated from the internet.
Jetson uses ARM core processors, so the packages obtained are built for ARM cores. However, there are relatively few servers (mirror sites) where packages built for ARM cores can be obtained. This can result in significant time delays during the software update process. The duration of this process depends on your network environment, so be sure to consider this when estimating the time required for the task.
One way to address this is to manually change the source of download mirrors if necessary.
Object Recognition in Videoes on the NVMe SSD
The installed JetPack comes with various machine learning networks and their corresponding training data, making it easy to execute machine learning processes using Jetson. Specific names and details of the available machine learning algorithms can be found in the documentation on GitHub.
For this verification, we created videos as shown in the table below and saved them on the NVMe SSD. We then conducted object recognition processes on these videos. The videos were recorded in the office surroundings, captured using a smartphone.
| resolution (e.g. display, dpi) | Frame Rate (fps) | Video Codecs | Bit Rate (Mbps) | File Size | Video Length (minutes) | |
|---|---|---|---|---|---|---|
| Video (1) | 4K (3840 x 2160) | 30 | H.264 | 40 | 2.78 GB | 10 |
| Video (2) | フルHD (1920 x 1080) | 60 | H.264 | 18 | 1.19 GB | 10 |
| Video (3) | フルHD (1920 x 1080) | 30 | H.265 | 12 | 608 MB | 7 |
The object recognition program processes input videos to identify objects and generates an output video file containing the results. The images extracted from the output video are depicted in the diagram below.
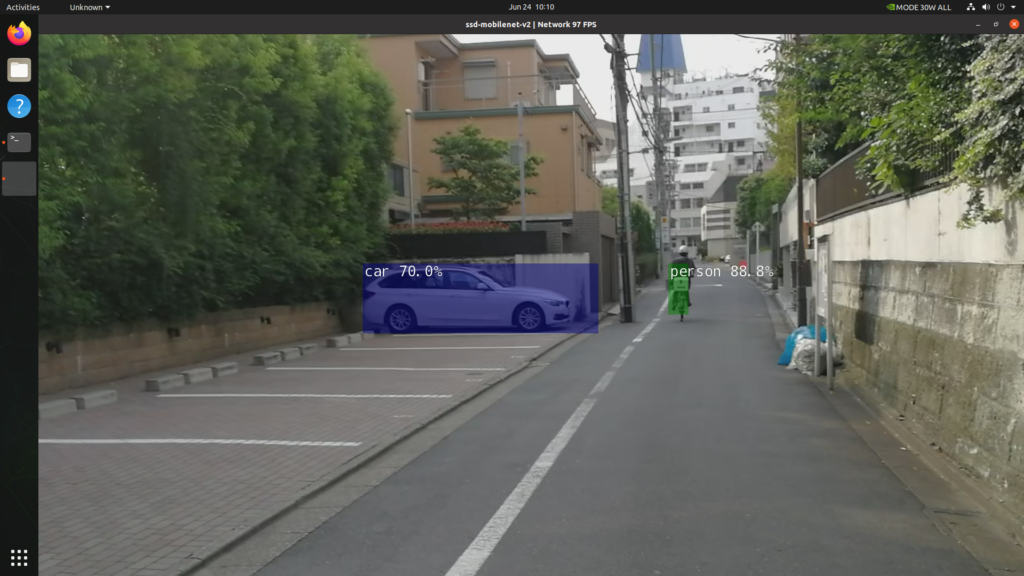
Due to potential biases in the pre-trained dataset, the recognition accuracy may not be exceptionally high. Nonetheless, the power of the Jetson, capable of handling this object recognition task effortlessly without the need for the cooling fan, is something to be acknowledged.
Furthermore, we ran the object recognition program simultaneously on all three videos listed in the previous table, and the results revealed the temperature of the NVMe SSD, as read from the S.M.A.R.T. attributes. The processing time for this observation was one hour, with the videos running in a loop, and the object recognition results continually being written to the NVMe SSD, as illustrated in the diagram below.
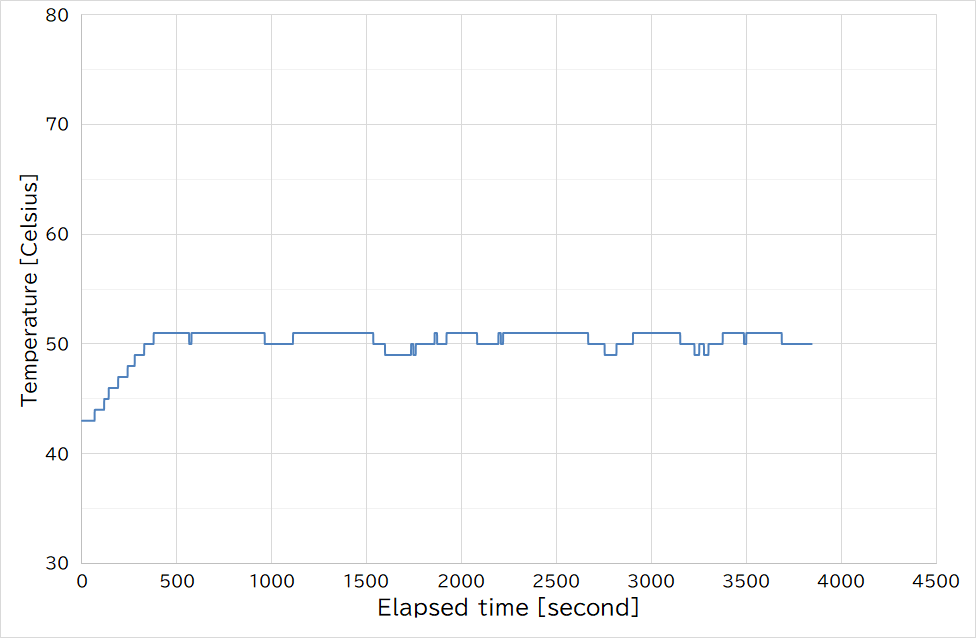
As shown in this diagram, even when reading from three videos simultaneously and writing recognition result videos, the temperature of the SSD has only increased to around 51 degrees Celsius.
For this test, the combined bit rate is approximately 140 Mbps (≈ 17.5 MB/s). This bandwidth offers sufficient headroom for the SSD to handle the imposed load, even when accounting for potential bursts of load from other processes. This is a significant contributing factor to the relatively modest increase in temperature.
Of course, the cooling effect provided by the large heat sink on the Jetson developer kit is also a significant factor.
Conclusion
In this article, we introduced the results of our verification by installing our H-Series M.2 NVMe SSD on the Jetson AGX Xavier Developer Kit. We covered the installation of JetPack on the NVMe SSD and performed object recognition in videos using pre-trained networks and the JetPack’s bundled object recognition program.
With the increasing demand for improved computational capabilities and larger data sizes in edge AI computing, the performance and size of storage are becoming more crucial, and NVMe SSDs are gaining more attention. We hope that this article serves as a reference for selecting storage when combined with Jetson Modules.
Furthermore, the latest models in the Jetson series, the Jetson Orin series, were recently released. Similar verifications, as presented in this article, will be conducted using the Jetson Orin series developer kit in the near future.
Trademarks of Other Companies
Although registered trademark marks are not indicated in the articles, company names and product names appearing in the articles are generally trademarks or registered trademarks of the respective companies.
About the article
The content of this article is information at the time of publication. Please note that the information is subject to change without notice.


